如何集成nextCloud与onlyOffice?
- By : Will
- Category : Cloud storage
- Tags: NextCloud, onlyOffice
1 基础知识
1.1 nextCloud onlyOffice插件介绍
– 该插件可使用户调用ONLYOFFICE Document Server的功能实现办公文件的在线编辑
– 该插件可实现编辑csv、docx、pptx、txt、xlsx格式
– 该插件可将支持的格式转换为Office Open XML格式,详细格式如下,
— doc、docm、dot、dotx
— epub、htm、html、odp、odt
— pot、potm、potx、pps、ppsm、ppsx、ppt、pptm
— rtf、xls、xlsm、xlsx、xlt、xltm、xltx
1.2 nextCloud onlyOffice菜单
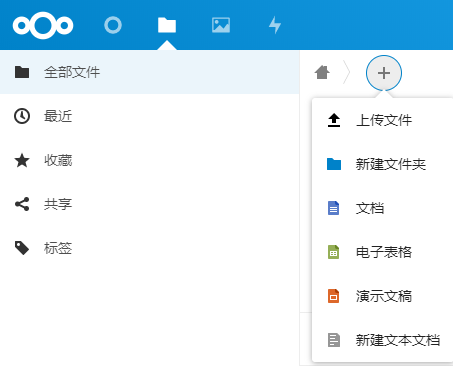
如上图所示,
– 该插件会在nextCloud中增加一个“+”号菜单
– 该菜单用于扩展实现onlyOffice的功能
1.3 nextCloud onlyOffice架构
1.3.1 局域网架构
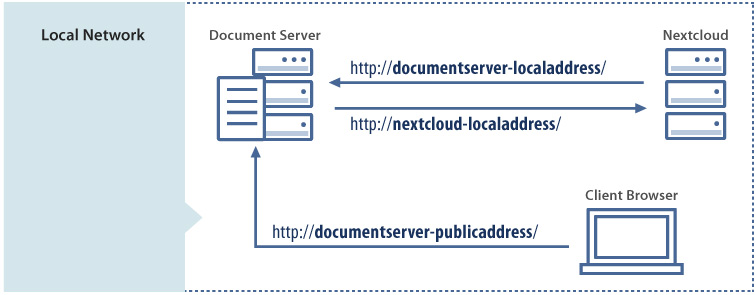
如上图所示,
基于局域网的环境,具体的访问规则如下,
– 用户浏览器需要允许访问nextCloud与ONLYOFFICE Document Server服务器
– nextCloud需要允许访问ONLYOFFICE Document Server服务器
– ONLYOFFICE Document Server需要允许访问nextCloud服务器
1.3.2 因特网架构
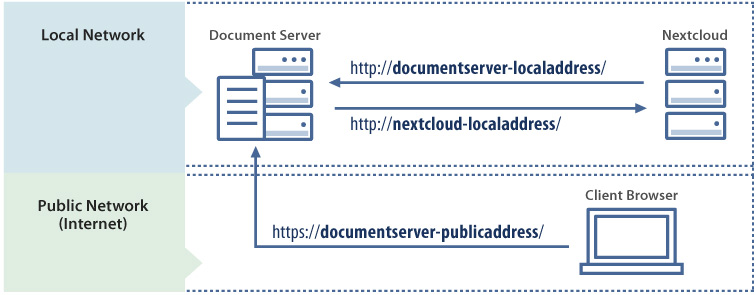
如上图所示,
基于因特网的环境,具体的访问规则如下,
– 用户浏览器需要允许访问nextCloud服务器
– 用户浏览器不允许访问ONLYOFFICE Document Server服务器
– nextCloud需要允许访问ONLYOFFICE Document Server服务器
– ONLYOFFICE Document Server需要允许访问nextCloud服务器
注:以上方式经过测试无法实现(可能是本人能力有限)
2 最佳实践
2.1 环境部署
部署nextCloud环境,
部署onlyOffice环境,
2.2 软件集成
2.2.1 配置名称解析
In nextCloud and onlyOffice,
vim /etc/hosts
需要加入如下参数,
10.168.0.80 nextcloud.cmdschool.org
10.168.0.81 onlyoffice.cmdschool.org
另外,以上设置也可以使用快速命令实现,
echo '10.168.0.80 nextcloud.cmdschool.org' >> /etc/hosts
echo '10.168.0.81 onlyoffice.cmdschool.org' >> /etc/hosts
注:以上配置可使用DNS代替
2.2.2 检查NTP服务是否同源
In nextCloud and onlyOffice,
systemctl status chronyd.service
检查确认以上服务正常运行,然后确认两台服务器的NTP服务器是一个来源(避免出现时间差),
grep server /etc/chrony.conf
可见如下输出,
# Use public servers from the pool.ntp.org project.
#server 0.centos.pool.ntp.org iburst
#server 1.centos.pool.ntp.org iburst
#server 2.centos.pool.ntp.org iburst
server 3.centos.pool.ntp.org iburst
2.2.3 设置秘钥
In onlyOffice,
cp /etc/onlyoffice/documentserver/local.json /etc/onlyoffice/documentserver/local.json.default
vim /etc/onlyoffice/documentserver/local.json
修改如下配置,
    "CoAuthoring": {
      [...]
      "token": {
        "enable": {
          "request": {
            "inbox": true,
            "outbox": true
          },
          "browser": true
        },
      [...]
      },
      "secret": {
        "inbox": {
          "string": "onlyofficeSecret"
        },
        "outbox": {
          "string": "onlyofficeSecret"
        },
        "session": {
          "string": "onlyofficeSecret"
        }
      }
    }
配置修改完毕后,需要重启服务使配置生效,
supervisorctl restart all
In nextCloud,
以管理员身份登录nextCloud,
单击【admin】 -> 【Settings】 -> 【ONLYOFFICE】
然后“Secret key”填写你的秘钥即可
2.2.4 启用onlyoffice插件
In nextCloud,
以管理员身份登录nextCloud,
单击【admin】 -> 【+Apps】
单击搜索图标并填入“onlyoffice”
在“onlyoffice”上单击【Download and enable】等待下载并启用即可
2.2.5 启用onlyoffice插件
以管理员身份登录nextCloud,
单击【admin】 -> 【Settings】 -> 【ONLYOFFICE】
在“Document Editing Service address”框中填入“https://onlyoffice.cmdschool.org”
在“Secret key (leave blank to disable)”框中填入“onlyofficeSecret”
单击【save】即可
2.2.6 文档的测试
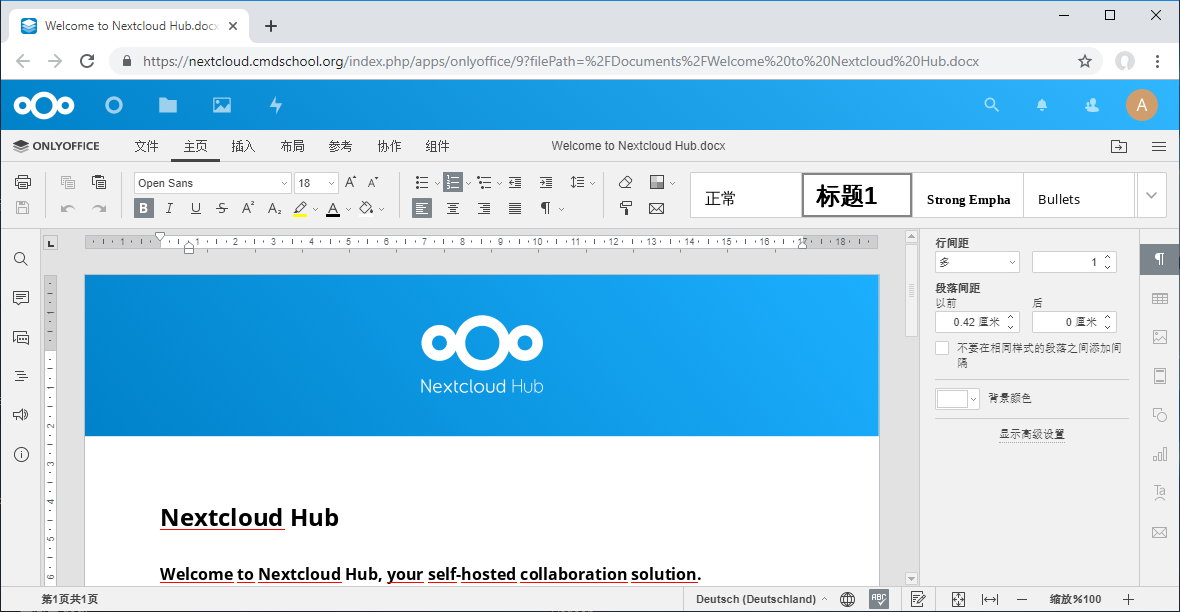
如上图所示,
打开doc文档测试可见如上显示。
参阅文档
=============
nextcloud与onlyOffice集成
————————–
https://api.onlyoffice.com/editors/nextcloud
秘钥配置
———–
https://api.onlyoffice.com/editors/signature
错误排查
———-
https://github.com/ONLYOFFICE/onlyoffice-owncloud/issues/181
https://github.com/ONLYOFFICE/CommunityServer/issues/157
https://www.orgleaf.com/3589.html
没有评论