
1 前言
笔者平素不喜欢简单的编译安装,因为很多系统管理员为了省事,编译安装的东西没有rpm包安装那种容易管理的感觉,所以,笔者的编译安装是尽量接近rpm安装的。
2 最佳实践
2.1 环境配置
2.1.1 环境配置
IP Address = 10.168.0.90
OS Type = CentOS 8.x-x86_64, RHEL-8.x-x86_64
2.1.2 升级系统版本
dnf update -y
2.1.3 安装编译环境
dnf -y install gcc gcc-c++ make expat-devel libtool
2.1.4 安装常用工具
dnf install -y wget net-tools vim bzip2 openssh-clients
2.1.5 下载apache软件包
cd ~
wget https://mirrors.tuna.tsinghua.edu.cn/apache/apr/apr-1.7.0.tar.gz
wget https://mirrors.tuna.tsinghua.edu.cn/apache/apr/apr-util-1.6.1.tar.gz
wget https://dlcdn.apache.org/httpd/httpd-2.4.52.tar.gz
2.1.6 下载php安装包
cd ~
wget https://www.php.net/distributions/php-8.1.1.tar.bz2
如以上安装包存在过时的情况或你需要其他版本请从以下页面下载,
http://apr.apache.org/download.cgi
http://www.apache.org/dyn/closer.cgi/httpd/
http://www.php.net/releases/
2.1.7 防火墙配置
firewall-cmd --permanent --add-service http
firewall-cmd --reload
firewall-cmd --list-all
2.1.8 关闭SELinux
sed -i 's/SELINUX=enforcing/SELINUX=disabled/g' /etc/selinux/config
setenforce 0
2.2 编译部署APR
2.2.1 清理旧的apr包
dnf remove -y arp apr-util apr-util-ldap
2.2.2 解压软件包
cd ~
tar -xf apr-1.7.0.tar.gz
tar -xf apr-util-1.6.1.tar.gz
2.2.3 预编译APR
cd ~/apr-1.7.0
./configure --prefix=/usr
2.2.4 编译并安装APR
make
make install
2.2.5 预编译APR-Util
cd ~/apr-util-1.6.1
./configure --prefix=/usr \
            --with-apr=/usr
2.2.6 编译并安装APR-Util
make
make install
2.3 编译部署Apache HTTPD
2.3.1 解压软件包
cd ~
tar -xf httpd-2.4.52.tar.gz
2.3.2 预编译软件包
cd ~/httpd-2.4.52
./configure --bindir=/usr/bin \
            --sbindir=/usr/sbin \
            --sysconfdir=/etc/httpd \
            --libdir=/usr/lib64  \
            --mandir=/usr/share/man \
            --includedir=/usr/include \
            --enable-so
如果遇到如下错误提示,
configure: error: pcre-config for libpcre not found. PCRE is required and available from http://pcre.org/
则需要安装以下包解决依赖关系,
dnf install -y pcre-devel
2.3.3 预编和安装软件包
make
make install
2.3.4 创建运行用户
groupadd  -g 48 apache
useradd -u 48 -g 48 -d /usr/share/httpd -s /sbin/nologin apache
2.3.5 修改运行用户以及配置
sed -i "s/User daemon/User apache/g" /etc/httpd/httpd.conf
sed -i "s/Group daemon/Group apache/g" /etc/httpd/httpd.conf
sed -i "s/\#ServerName www.example.com\:80/ServerName localhost\:80/g" /etc/httpd/httpd.conf
2.3.6 测试服务启动与关闭
apachectl -f /etc/httpd/httpd.conf -k start
apachectl -f /etc/httpd/httpd.conf -k stop
2.3.7 检查服务启动
netstat -antp | grep httpd
ps -ef | grep httpd
2.3.8 检查服务
2.4 安装优化与定制
2.4.1 配置服务
vim /etc/systemd/system/httpd.service
增加如下配置:
[Service]
Type=forking
PIDFile=/usr/local/apache2/logs/httpd.pid
ExecStartPost=/bin/sleep 0.2
ExecStart=/bin/sh -c '/usr/sbin/apachectl -f /etc/httpd/httpd.conf -k start'
ExecStop=/bin/sh -c '/usr/sbin/apachectl -f /etc/httpd/httpd.conf -k stop'
ExecReload=/bin/sh -c '/usr/sbin/apachectl -f /etc/httpd/httpd.conf -k graceful'

[Install]
WantedBy=multi-user.target
重载使配置生效:
systemctl daemon-reload
2.4.2 启动服务并开机启动
systemctl start httpd.service
systemctl enable httpd.service
2.4.3 新增配置文件目录
mkdir -p /etc/httpd/conf.d
echo 'Include /etc/httpd/conf.d/*.conf' >> /etc/httpd/httpd.conf
2.4.4 优化目录结构
mkdir -p /var/www
ln -s /usr/local/apache2/htdocs /var/www/html
ln -s /usr/local/apache2/logs /var/log/httpd
2.4.5 配置日志切割
修改配置文件:
vim /etc/logrotate.d/httpd
加入如下配置:
/usr/local/apache2/logs/*log {
    missingok
    notifempty
    sharedscripts
    delaycompress
    postrotate
        systemctl reload httpd > /dev/null 2>/dev/null || true
    endscript
}
你可以使用如下命令测试日志切割,
logrotate /etc/logrotate.d/httpd
2.5 编译安装PHP
2.5.1 清理php安装包
dnf remove `rpm -qa | grep php`
2.5.2 解压安装包
cd ~/
tar -xf php-8.1.1.tar.bz2
2.5.3 安装前构建
cd ~/php-8.1.1
./configure --bindir=/usr/bin \
            --sbindir=/usr/sbin \
            --sysconfdir=/etc \
            --with-config-file-path=/etc \
            --libdir=/usr/lib64  \
            --mandir=/usr/share/man \
            --includedir=/usr/include \
            --with-apxs2=/usr/bin/apxs
如果需要使用MySQL数据库,请使用如下参数编译(动态编译可能无法加载,所以不建议),
cd ~/php-8.1.1
./configure --bindir=/usr/bin \
            --sbindir=/usr/sbin \
            --sysconfdir=/etc \
            --with-config-file-path=/etc \
            --libdir=/usr/lib64  \
            --mandir=/usr/share/man \
            --includedir=/usr/include \
            --with-apxs2=/usr/bin/apxs \
            --with-pdo-mysql
注:如果需要使用PostgreSQL数据库,请使用如下参数编译(注,不同版本的PostgreSQL实际路径有所不同),
如PostgreSQL9.6版本,
cd ~/php-8.1.1
./configure --bindir=/usr/bin \
            --sbindir=/usr/sbin \
            --sysconfdir=/etc \
            --with-config-file-path=/etc \
            --libdir=/usr/lib64  \
            --mandir=/usr/share/man \
            --includedir=/usr/include \
            --with-apxs2=/usr/bin/apxs \
            --with-pdo-pgsql=/usr/pgsql-9.6
如PostgreSQL10版本,
cd ~/php-8.1.1
./configure --bindir=/usr/bin \
            --sbindir=/usr/sbin \
            --sysconfdir=/etc \
            --with-config-file-path=/etc \
            --libdir=/usr/lib64  \
            --mandir=/usr/share/man \
            --includedir=/usr/include \
            --with-apxs2=/usr/bin/apxs \
            --with-pdo-pgsql=/usr/pgsql-10
如果遇到以下错误提示,
configure: error: Package requirements (libxml-2.0 >= 2.9.0) were not met:
则需要安装以下包解决依赖关系,
dnf install -y libxml2-devel
如果遇到以下错误提示,
configure: error: Package requirements (sqlite3 >= 3.7.7) were not met:
则需要安装以下包解决依赖关系,
dnf install -y sqlite-devel
根据提示解决安装的依赖关系(可选,适用于PostgreSQL数据库),请根据当前的具体版本安装,
dnf install -y postgresql96-devel
dnf install -y postgresql10-devel
注:以上根据实际选一个版本即可
2.5.4 编译并安装
make
make install | tee install.log
2.5.5 配置php.ini
cp php.ini-development /etc/php.ini
2.5.6 修改时区
sed -i 's/;date.timezone =/date.timezone = Asia\/Shanghai/g' /etc/php.ini
2.6 Apache加载并优化PHP
2.6.1 确认模块编译成功
find /usr/ -name libphp\*.so
可见如下显示:
/usr/local/apache2/modules/libphp.so
2.6.2 确认模块已经加载
grep modules/libphp /etc/httpd/httpd.conf
可见如下显示,否则请手动添加,
LoadModule php_module modules/libphp.so
注:适合于PHP 8
LoadModule php7_module modules/libphp7.so
注:适合于PHP 7
LoadModule php5_module modules/libphp5.so
注:适合于PHP 5
2.6.3 配置后缀和session的位置
vim /etc/httpd/conf.d/php.conf
加入如下配置:
#
# Cause the PHP interpreter to handle files with a .php extension.
#
<FilesMatch \.php$>
SetHandler application/x-httpd-php
</FilesMatch>

#
# Allow php to handle Multiviews
#
AddType text/html .php

#
# Add index.php to the list of files that will be served as directory
# indexes.
#
DirectoryIndex index.php

#
# Uncomment the following lines to allow PHP to pretty-print .phps
# files as PHP source code:
#
#<FilesMatch \.phps$>
# SetHandler application/x-httpd-php-source
#</FilesMatch>

#
# Apache specific PHP configuration options
# those can be override in each configured vhost
#
php_value session.save_handler "files"
php_value session.save_path "/var/lib/php/session"
配置session目录:
mkdir -p /var/lib/php/session
chown apache:apache /var/lib/php/session
chmod 775 /var/lib/php/session
2.6.4 重启服务是配置生效
systemctl restart httpd.service
2.7 测试PHP
2.7.1 添加测试代码
mkdir -p /var/www/html
echo '<?php phpinfo(); ?>' > /var/www/html/index.php
2.7.2 访问测试连接
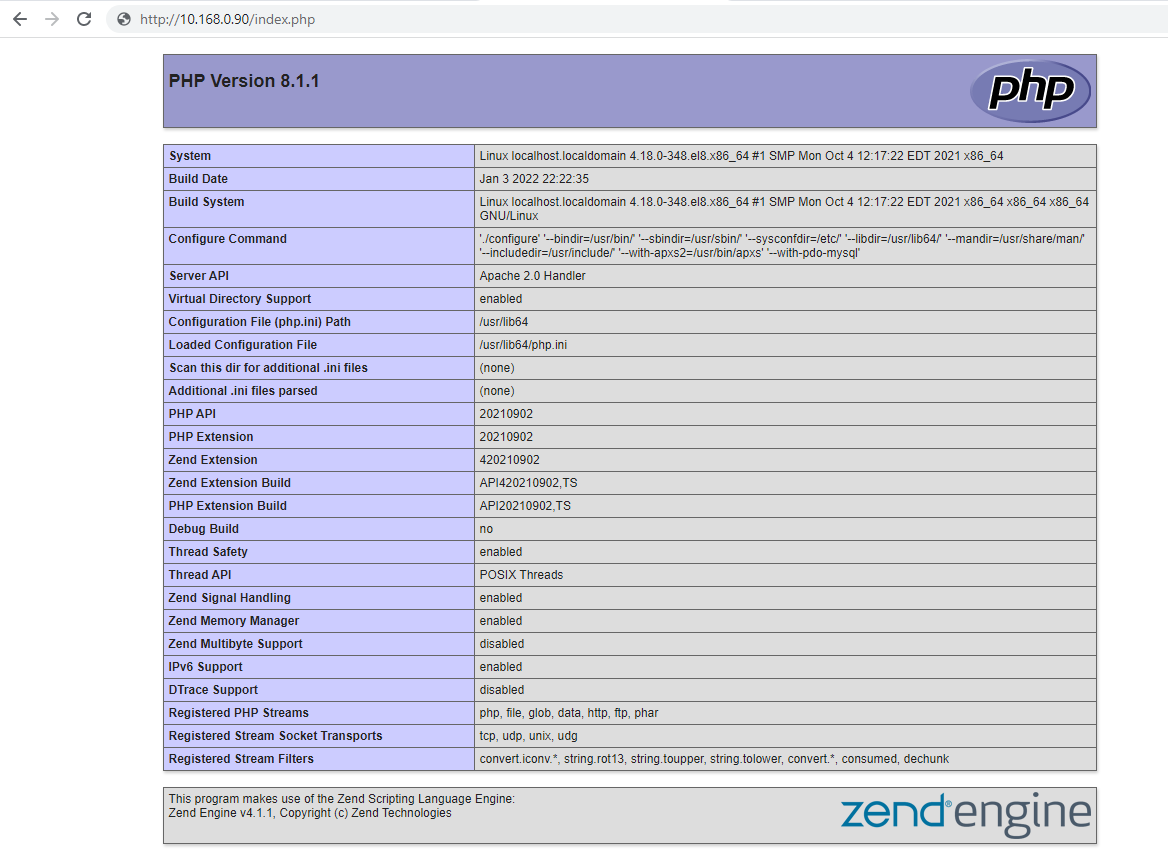
2.8 动态增加PHP模块
请按照以下教程执行,
https://www.cmdschool.org/archives/3166
2.9 增加SSL支持
2.9.1 增加防火墙
firewall-cmd --permanent --add-service https
firewall-cmd --reload
firewall-cmd --list-all
2.9.2 增加SSL所需的模块
cd ~/httpd-2.4.52
./configure --bindir=/usr/bin \
            --sbindir=/usr/sbin \
            --sysconfdir=/etc/httpd \
            --libdir=/usr/lib64  \
            --mandir=/usr/share/man \
            --includedir=/usr/include \
            --enable-so \
            --enable-ssl \
            --enable-socache-shmcb
如果遇到以下错误提示,
checking whether to enable mod_ssl... configure: error: mod_ssl has been requested but can not be built due to prerequisite failures
则需要安装以下包解决依赖关系,
dnf install -y openssl-devel
2.9.3 预编和安装软件包
make
make install
2.9.4 启用SSL所需的模块
sed -i "s/\#LoadModule socache\_shmcb\_module modules\/mod\_socache\_shmcb\.so/LoadModule socache\_shmcb\_module modules\/mod\_socache\_shmcb\.so/g" /etc/httpd/httpd.conf
2.9.5 增加SSL所需的配置
vim /etc/httpd/conf.d/httpd-ssl.conf
增加如下配置:
LoadModule ssl_module modules/mod_ssl.so
Listen 443
SSLPassPhraseDialog builtin
SSLSessionCache shmcb:/var/cache/mod_ssl/scache(512000)
SSLSessionCacheTimeout 300
SSLRandomSeed startup file:/dev/urandom 256
SSLRandomSeed connect builtin
SSLCryptoDevice builtin
住:由于配置虚拟机需要申请证书,故以上省略虚拟机配置。
2.9.6 重启服务是配置生效
systemctl restart httpd
2.9.7 确认配置生效
netstat -antp | grep :::443
可见如下显示,
tcp6 0 0 :::443 :::* LISTEN 8545/httpd
参阅文档:
==============
Apache的下载:
—————-
http://archive.apache.org/dist/httpd/
Apache的安装
—————-
http://httpd.apache.org/docs/2.4/install.html
PHP的安装
http://php.net/manual/en/install.unix.apache2.php
Apache SSL
—————–
http://httpd.apache.org/docs/2.4/ssl/ssl_howto.html
http://httpd.apache.org/docs/2.4/mod/mod_ssl.html
Apache的服务控制
—————-
https://httpd.apache.org/docs/trunk/stopping.html
PHP GD config
—————–
https://bugs.php.net/bug.php?id=78314
没有评论