1 简介
WebDAV (Web-based Distributed Authoring and Versioning) 一种基于 HTTP 1.1协议的通信协议。它扩展了HTTP 1.1,在GET、POST、HEAD等几个HTTP标准方法以外添加了一些新的方法,使应用程序可直接对Web Server直接读写,并支持写文件锁定(Locking)及解锁(Unlock),还可以支持文件的版本控制,本章使用nginx加载模块webdav实现此功能。
2 环境
2.1 环境信息
ipaddress=10.168.0.154
hostname=webdav_nginx.cmdschool.org
os=CentOS 6.8
2.2 yum源配置
yum -y install gcc gcc-c++ make expat-devel
yum -y install rpm-build
2.3 创建构建用户
useradd -u 1001 builder
2.4 关闭selinux
setenforce 0
sed -i 's/SELINUX=enforcing/SELINUX=disabled/g' /etc/selinux/config
3 构建rpm包部分
3.1 下载安装包
su - builder
cd ~
wget http://nginx.org/packages/centos/6/SRPMS/nginx-1.8.1-1.el6.ngx.src.rpm
wget -O nginx-dav-ext-module.zip https://codeload.github.com/arut/nginx-dav-ext-module/zip/master
3.2 解压并测试构建环境
3.2.1 构建环境测试命令
rpm -ivh nginx-1.8.1-1.el6.ngx.src.rpm
rpmbuild -bb rpmbuild/SPECS/nginx.spec
3.2.2 异常情况
如果看到类似提示:
error: Failed build dependencies:
        openssl-devel >= 1.0.1 is needed by nginx-1.8.1-1.el6.ngx.x86_64
        zlib-devel is needed by nginx-1.8.1-1.el6.ngx.x86_64
        pcre-devel is needed by nginx-1.8.1-1.el6.ngx.x86_64
请先决绝包的依赖关系然后重试:
exit
yum -y install openssl-devel zlib-devel pcre-devel
3.2.3 正常情况
如果末尾类似的提示表示构建环境测试通过或称重新打包完成:
+ umask 022
+ cd /home/builder/rpmbuild/BUILD
+ cd nginx-1.8.1
+ /bin/rm -rf /home/builder/rpmbuild/BUILDROOT/nginx-1.8.1-1.el6.ngx.x86_64
+ exit 0
3.3 配置webdav模块
unzip nginx-dav-ext-module.zip
cp -a nginx-dav-ext-module-master/ rpmbuild/BUILD/nginx-dav-ext-module
3.4 修改构建文件
3.4.1 创建配置文件副本
cd rpmbuild/SPECS
cp nginx.spec nginx.spec.orig
3.4.2 修改配置文件参数
vim nginx.spec
修改如下行:
--with-http_dav_module \
增加参数后行如下:
--with-http_dav_module --add-module=../nginx-dav-ext-module \
3.5 重新构建rpm包
diff -uN nginx.spec.orig nginx.spec > nginx-dav-ext.patch
patch -p0 < nginx-dav-ext.patch
rpmbuild -bb nginx.spec
exit
4 配置webdav服务
4.1 安装nginx包
cd /home/builder/rpmbuild/RPMS/x86_64/
yum -y install nginx-1.8.1-1.el6.ngx.x86_64.rpm
4.2 确认模块启用
nginx -V
显示如下:
nginx version: nginx/1.8.1
built by gcc 4.4.7 20120313 (Red Hat 4.4.7-17) (GCC)
built with OpenSSL 1.0.1e-fips 11 Feb 2013
TLS SNI support enabled
configure arguments: --prefix=/etc/nginx --sbin-path=/usr/sbin/nginx --conf-path=/etc/nginx/nginx.conf --error-log-path=/var/log/nginx/error.log --http-log-path=/var/log/nginx/access.log --pid-path=/var/run/nginx.pid --lock-path=/var/run/nginx.lock --http-client-body-temp-path=/var/cache/nginx/client_temp --http-proxy-temp-path=/var/cache/nginx/proxy_temp --http-fastcgi-temp-path=/var/cache/nginx/fastcgi_temp --http-uwsgi-temp-path=/var/cache/nginx/uwsgi_temp --http-scgi-temp-path=/var/cache/nginx/scgi_temp --user=nginx --group=nginx --with-http_ssl_module --with-http_realip_module --with-http_addition_module --with-http_sub_module --with-http_dav_module --add-module=../nginx-dav-ext-module --with-http_flv_module --with-http_mp4_module --with-http_gunzip_module --with-http_gzip_static_module --with-http_random_index_module --with-http_secure_link_module --with-http_stub_status_module --with-http_auth_request_module --with-mail --with-mail_ssl_module --with-file-aio --with-ipv6 --with-http_spdy_module --with-cc-opt='-O2 -g -pipe -Wall -Wp,-D_FORTIFY_SOURCE=2 -fexceptions -fstack-protector --param=ssp-buffer-size=4 -m64 -mtune=generic'
可见配置的参数后面有加载模块:
--add-module=../nginx-dav-ext-module
4.3 创建上传目录
mkdir -p /home/swapzone/
chown nginx:nginx /home/swapzone/
chmod 700 /home/swapzone/
4.4 创建配置文件
vim /etc/nginx/conf.d/webdav.conf
修改内容如下:
server {
    listen       80;
    server_name  webdav.cmdschool.org;
    access_log  /var/log/nginx/webdav.access.log  main;
    location / {
        root    /home/swapzone;
        autoindex on;
        dav_methods PUT DELETE MKCOL COPY MOVE;
        dav_ext_methods PROPFIND OPTIONS;
        create_full_put_path  on;
        dav_access user:rw group:r all:r;
        auth_basic "Authorized Users Only";
        auth_basic_user_file /etc/nginx/.htpasswd;
    }
    error_page   500 502 503 504  /50x.html;
    location = /50x.html {
        root   /usr/share/nginx/html;
    }
}
4.5 重启服务并配置服务默认启动
/etc/init.d/nginx restart
chkconfig nginx on
4.6 配置身份验证
4.6.1安装httpd工具
yum -y install httpd-tools
4.6.2 创建密码文件和密码
1)创建密码文件和创建用户密码
htpasswd -c /etc/nginx/.htpasswd user1
htpasswd /etc/nginx/.htpasswd user2
2)密码文件权限配置
chown nginx:nginx /etc/nginx/.htpasswd
chmod 600 /etc/nginx/.htpasswd
4.7 配置防火墙
4.7.1 修改防火墙配置文件
vim /etc/sysconfig/iptables
加入如下配置:
-A INPUT -m state --state NEW -m tcp -p tcp --dport 80 -j ACCEPT
4.7.2 重启并使配置生效
/etc/init.d/iptables restart
5 客户端
5.1 下载客户端
官方首页:https://cyberduck.io/
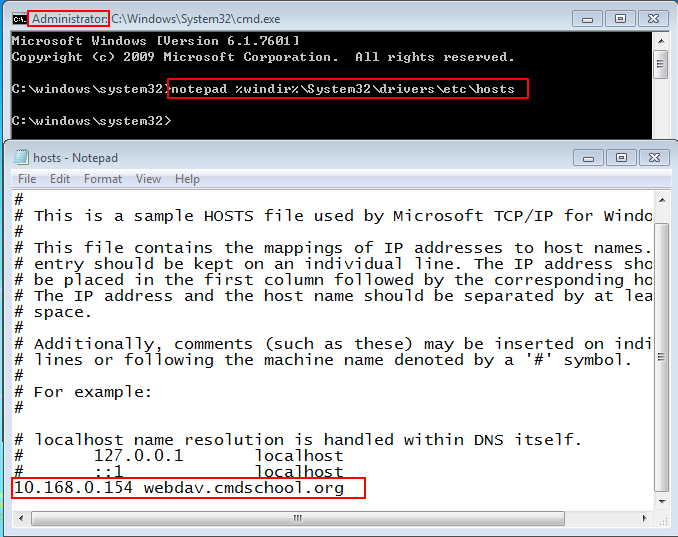
5.2 配置名称解析

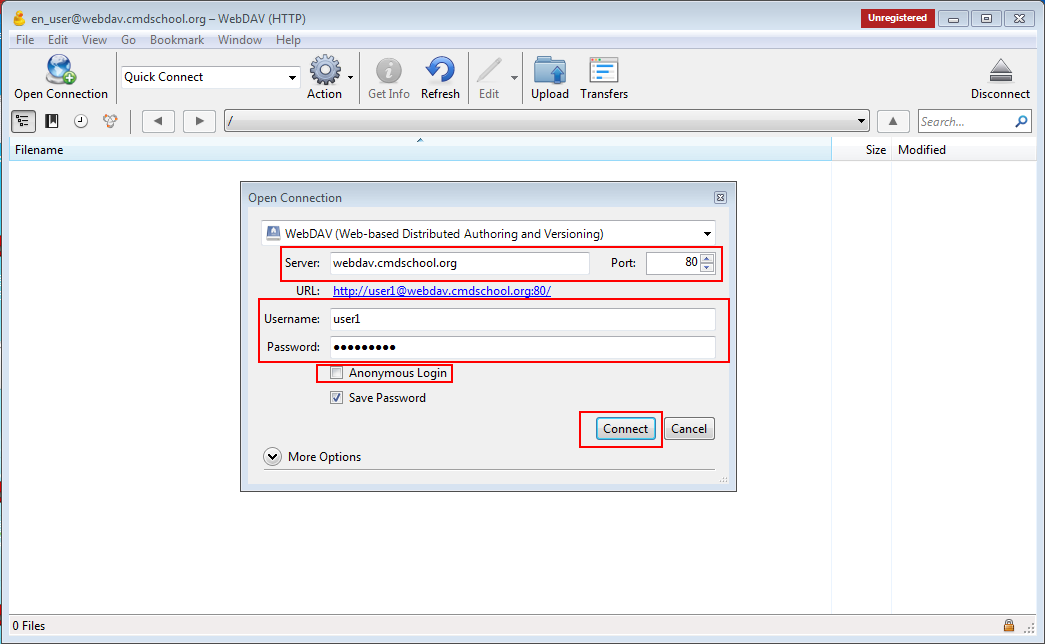
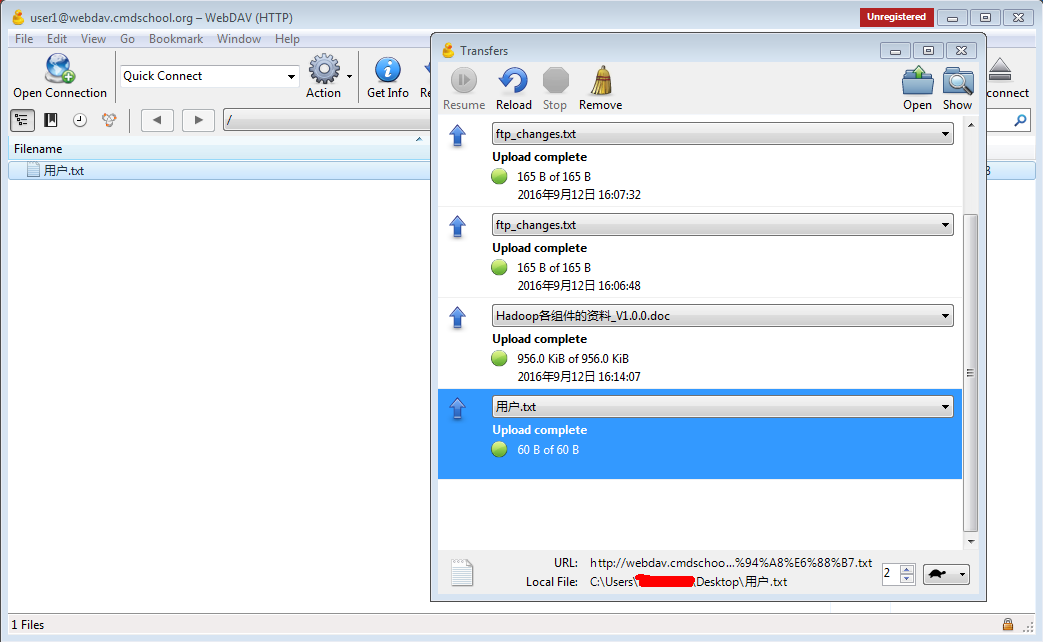
5.3 安装并测试


=====================================
参阅资料
https://github.com/arut/nginx-dav-ext-module
http://nginx.org/en/docs/http/ngx_http_dav_module.html
http://blog.sina.com.cn/s/blog_704836f40102w5je.html
没有评论