
1 理论部分
1.1 模块的名称和作用
– 模块名称,http_auth_request_module
– 该模块可将身份认证的请求发送到后端服务器认证接口,然后返回认证结果到前端服务器
1.2 工作原理
– 客户端发起http请求触发前端服务器的认证需求
– 前端的认证模块将身份认证请求转发到后端认证服务器接口并返回认证提示到前端
– 前端认证模块将接收到的客户端的身份信息后转发给后端认证服务器接口校验
– 当后端服务器返回2xx响应则允许客户端访问前端的服务器的资源
– 当后端服务器返回401或403则拒绝客户端访问前端的服务器的资源
1.3 配置范例
location /private/ {
    auth_request /auth;
    ...
}

location = /auth {
    proxy_pass ...
    proxy_pass_request_body off;
    proxy_set_header Content-Length "";
    proxy_set_header X-Original-URI $request_uri;
}
1.4 模块的命令
1.4.1 指定认证的URI
语 法:auth_request uri | off;
默认值:
上下文:http,server,location
作 用:指定子请求认证的URI
1.4.2 保存授权请求变量
语 法:auth_request_set $variable value;
默认值:-
上下文:http,server,location
作 用:将授权请求的变量$variable的保存到value中
1.5 启用模块的参数
--with-http_auth_request_module
注:由于该模块不是默认模块,需要使用参数启用
2 部署后端认证接口
2.1 环境配置
2.1.1 环境信息
ip addresses = 10.168.0.80
host name = auth.cmdschool.org
os = centos 7.x x86_64
2.1.1 部署LNMP环境
https://www.cmdschool.org/archives/1
注:实验环境MySQL可选
2.2 部署认证站点
2.2.1 创建认证代码存放目录
mkdir /var/www/auth.cmdschool.org
2.2.2 增加认证虚拟服务器
vim /etc/nginx/conf.d/auth.cmdschool.org.conf
加入如下配置
server {
    listen       80;
    server_name  auth.cmdschool.org;

    location / {
        root   /var/www/auth.cmdschool.org;
        index  index.php;
    }

    error_page   500 502 503 504  /50x.html;
    location = /50x.html {
        root   /usr/share/nginx/html;
    }

    location ~ \.php$ {
        root           /var/www/auth.cmdschool.org;
        fastcgi_pass   127.0.0.1:9000;
        fastcgi_index  index.php;
        fastcgi_param  SCRIPT_FILENAME  $document_root$fastcgi_script_name;
        include        /etc/nginx/fastcgi_params;
    }

}
2.2.3 重启服务使配置生效
systemctl restart nginx
2.2.4 检查PHP运行
echo '<?php phpinfo(); ?>' > /var/www/auth.cmdschool.org/phpinfo.php
2.2.5 测试PHP运行
http://auth.cmdschool.org/phpinfo.php
注:以上域名能够访问需要预先配置DNS解析或者设置host解析
2.2.6 创建认证代码
vim /var/www/auth.cmdschool.org/httpBasicAuth.php
加入如下配置:
<?php

if(isset($_SERVER['PHP_AUTH_USER'], $_SERVER['PHP_AUTH_PW'])){
    $username = $_SERVER['PHP_AUTH_USER'];
    $password = $_SERVER['PHP_AUTH_PW'];

    if ($username == 'user' && $password == 'pwd'){
        return true;
    }
}

header('WWW-Authenticate: Basic realm="Git Server"');
header('HTTP/1.0 401 Unauthorized');

?>
代码分析,
– 代码通过服务器变量$_SERVER[‘PHP_AUTH_USER’]和$_SERVER[‘PHP_AUTH_PW’]接收客户端提交的用户名和密码
– 代码通过判断用户名和密码是否为特定的值,如果通过则返回“2xx”回应
– 范例中仅做示范,生产中请结合数据库做校验
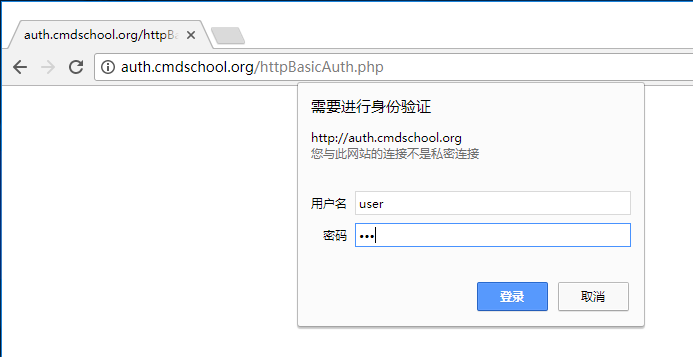
2.2.7 测试后端认证接口
http://auth.cmdschool.org/httpBasicAuth.php
3 搭建带认证前端服务器
3.1 系统环境配置
3.1.1 环境信息
IP Address = 10.168.0.154
Host Nmae = nginx_auth.cmdschool.org
OS = CentOS 7.1 x86_64
3.1.2 关闭SELinux
setenforce 0
sed -i 's/SELINUX=enforcing/SELINUX=disabled/g' /etc/selinux/config
3.1.3 安装系统常用工具
yum install -y vim
3.2 软件环境配置
3.2.1 配置yum源
yum install -y http://nginx.org/packages/centos/7/noarch/RPMS/nginx-release-centos-7-0.el7.ngx.noarch.rpm
3.2.2 确认模块启用
nginx -V
显示如下:
nginx version: nginx/1.14.0
built by gcc 4.8.5 20150623 (Red Hat 4.8.5-16) (GCC)
built with OpenSSL 1.0.2k-fips  26 Jan 2017
TLS SNI support enabled
configure arguments: --prefix=/etc/nginx --sbin-path=/usr/sbin/nginx --modules-path=/usr/lib64/nginx/modules --conf-path=/etc/nginx/nginx.conf --error-log-path=/var/log/nginx/error.log --http-log-path=/var/log/nginx/access.log --pid-path=/var/run/nginx.pid --lock-path=/var/run/nginx.lock --http-client-body-temp-path=/var/cache/nginx/client_temp --http-proxy-temp-path=/var/cache/nginx/proxy_temp --http-fastcgi-temp-path=/var/cache/nginx/fastcgi_temp --http-uwsgi-temp-path=/var/cache/nginx/uwsgi_temp --http-scgi-temp-path=/var/cache/nginx/scgi_temp --user=nginx --group=nginx --with-compat --with-file-aio --with-threads --with-http_addition_module --with-http_auth_request_module --with-http_dav_module --with-http_flv_module --with-http_gunzip_module --with-http_gzip_static_module --with-http_mp4_module --with-http_random_index_module --with-http_realip_module --with-http_secure_link_module --with-http_slice_module --with-http_ssl_module --with-http_stub_status_module --with-http_sub_module --with-http_v2_module --with-mail --with-mail_ssl_module --with-stream --with-stream_realip_module --with-stream_ssl_module --with-stream_ssl_preread_module --with-cc-opt='-O2 -g -pipe -Wall -Wp,-D_FORTIFY_SOURCE=2 -fexceptions -fstack-protector-strong --param=ssp-buffer-size=4 -grecord-gcc-switches -m64 -mtune=generic -fPIC' --with-ld-opt='-Wl,-z,relro -Wl,-z,now -pie'
注:显示包含关键字“–with-http_auth_request_module”则模块已经启用
3.2.3 启动服务并配置自启动
systemctl start nginx.service
systemctl enable nginx.service
3.2.4 配置防火墙
firewall-cmd --permanent --add-service http
firewall-cmd --reload
firewall-cmd --list-all
3.3 配置网站
3.3.1 新建网站代码存放目录
mkdir -p /var/www/www.cmdschool.org
3.3.2 创建网站配置
vim /etc/nginx/conf.d/www.cmdschool.org.conf
加入如下配置:
server {
    listen       80;
    server_name  www.cmdschool.org;

    location / {
        root   /var/www/www.cmdschool.org;
        index  index.html index.htm;
    }

    error_page   500 502 503 504  /50x.html;
    location = /50x.html {
        root   /usr/share/nginx/html;
    }
}
3.3.3 检查配置语法
nginx -t
3.3.4 重启使配置生效
systemctl restart nginx.service
3.3.5 创建测试页
echo www.cmdschool.org > /var/www/www.cmdschool.org/index.html
3.3.6 浏览器测试
http://www.cmdschool.org
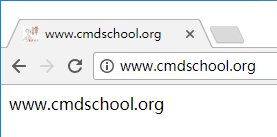
注:以上域名能够访问需要预先配置DNS解析或者设置host解析
3.4 配置认证模块
3.4.1 创建名称解析
echo '10.168.0.80 auth.cmdschool.org' >> /etc/hosts
注:可使用DNS代替
3.4.2 添加认证配置
vim /etc/nginx/conf.d/www.cmdschool.org.conf
添加如下配置:
server {
    [...]
    location / {
        auth_request /auth;
        [...]
    }

    location = /auth {
        proxy_pass http://auth.cmdschool.org/httpBasicAuth.php;
        proxy_pass_request_body off;
        proxy_set_header Content-Length "";
        proxy_set_header X-Original-URI $request_uri;
    }
    [...]
}
3.4.3 测试认证配置
nginx -t
3.4.4 重启服务使配置生效
systemctl restart nginx.service
3.4.5 浏览器测试
http://www.cmdschool.org
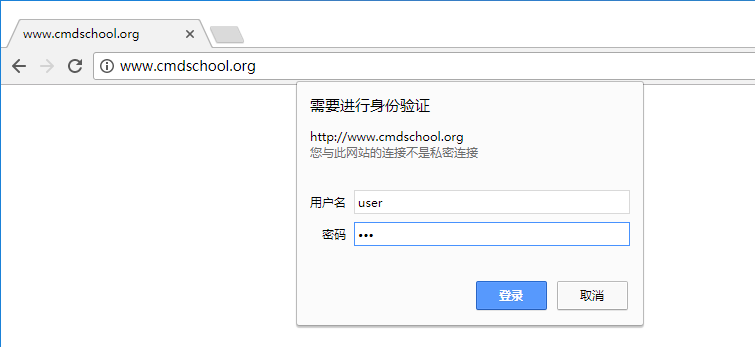
如上图所示:
通过前端的Nginx去Call后端的认证接口,可将后端的认证传递到前端,由于后端的认证是PHP代码实现,故可实现非常灵活的认证。
4 高级部分
4.1 缓存认证的钥匙
4.1.1 原理分析
– 使用缓存技术记录前端服务器与后端认证接口的返回结果,如403,200等
– 由于返回结果的缓存都是公用的,所以需要区分不同客户端的缓存结果,否则首个用户认证通过,则后面的用户都通过
4.1.2 添加缓存目录
mkdir -p /data/nginx/cache
4.1.3 添加带缓存的验证配置
vim /etc/nginx/conf.d/www.cmdschool.org.conf
添加如下配置:
proxy_cache_path /data/nginx/cache/one levels=2:2:2  keys_zone=one:10m
                 inactive=24h  max_size=1g;
server {
    [...]
    location / {
        auth_request /auth;
        [...]
    }

    location = /auth {
        proxy_pass http://auth.cmdschool.org/httpBasicAuth.php;
        proxy_pass_request_body off;
        proxy_set_header Content-Length "";
        proxy_set_header X-Original-URI $request_uri;
        proxy_cache            one;
        proxy_cache_valid      200  5m;
        proxy_cache_valid      403  3s;
        proxy_cache_key $request_id;
    }
    [...]
}
4.1.4 测试认证配置
nginx -t
4.1.5 重启服务使配置生效
systemctl restart nginx.service
===============================
参阅文档:
http://nginx.org/en/docs/http/ngx_http_auth_request_module.html
http://nginx.org/en/docs/http/ngx_http_proxy_module.html
https://www.nginx.com/resources/wiki/extending/examples/auth_request/
https://www.cnblogs.com/wangxiaoqiangs/p/6184181.html
https://redbyte.eu/en/blog/using-the-nginx-auth-request-module/
没有评论