RHDS
1 理论基础
1.1 概念
RHDS是Red Hat Directory Service的简称,是一套基于openldap的企业目录服务。
1.2 功能
– 代替LDAP
– 同步微软的活动目录信息
2 最佳实践
2.1 系统环境配置
2.1.1 主机名称和IP配置
OS=Oracle Linux 9.x x86_64
hostname=389ds.cmdschool.org
ipaddress=192.168.0.155
2.1.2 升级系统
dnf -y update
2.1.3 禁用SELinux
sed -i 's/SELINUX=enforcing/SELINUX=disabled/g' /etc/selinux/config
setenforce 0
2.1.4 配置yum源
dnf install -y epel-release
curl https://copr.fedorainfracloud.org/coprs/g/389ds/389-directory-server/repo/centos-stream-9/group_389ds-389-directory-server-centos-stream-9.repo > /etc/yum.repos.d/group_389ds-389-directory-server-centos-stream-9.repo
2.2 软件环境配置
2.2.1 安装389 DS基础包
dnf install -y 389-ds-base
2.2.2 安装389 cockpit网页界面
dnf install -y cockpit-389-ds
2.3 配置389 DS与admin服务
2.3.1 初始化DS服务
dscreate interactive
配置向导如下,
Install Directory Server (interactive mode)
===========================================
selinux is disabled, will not relabel ports or files.

Selinux support will be disabled, continue? [yes]:

Enter system's hostname [389ds.cmdschool.org]:

Enter the instance name [389ds]:

Enter port number [389]:

Create self-signed certificate database [yes]:

Enter secure port number [636]:

Enter Directory Manager DN [cn=Directory Manager]:

Enter the Directory Manager password: 389dspwd
Confirm the Directory Manager Password: 389dspwd

Enter the database suffix (or enter "none" to skip) [dc=389ds,dc=cmdschool,dc=org]: dc=cmdschool,dc=org
Create sample entries in the suffix [no]: yes

Do you want to start the instance after the installation? [yes]:

Are you ready to install? [no]: yes
Starting installation ...
Validate installation settings ...
Create file system structures ...
Create self-signed certificate database ...
selinux is disabled, will not relabel ports or files.
selinux is disabled, will not relabel ports or files.
Create database backend: dc=cmdschool,dc=org ...
Perform post-installation tasks ...
Completed installation for instance: slapd-389ds
2.3.2 检查和设置服务自动启动
dsctl 389ds status
以上命令用户服务的控制,另外以下systemctl服务脚本会被自动创建,可使用如下命令控制,
systemctl restart dirsrv@389ds.service
systemctl enable dirsrv@389ds.service
systemctl status dirsrv@389ds.service
2.3.3 配置cockpit服务
sed -i 's/^root/#root/g' /etc/cockpit/disallowed-users
以上命令注解掉禁止root登录的配置,你需要启动如下服务方便使用Web UI管理,
systemctl start cockpit.socket
systemctl enable cockpit.socket
systemctl status cockpit.socket
2.3.4 配置防火墙开启服务端口
firewall-cmd --permanent --add-service ldap --add-service ldaps
firewall-cmd --permanent --add-service cockpit
firewall-cmd --reload
firewall-cmd --list-all
2.4 使用389-console
echo '192.168.0.155 389ds.cmdschool.org' >> /etc/hosts
以上测试环境使用主机记录代替DNS,如果生产环境请使用DNS,然后,你可以使用如下域名测试服务,
https://389ds.cmdschool.org:9090/389-console
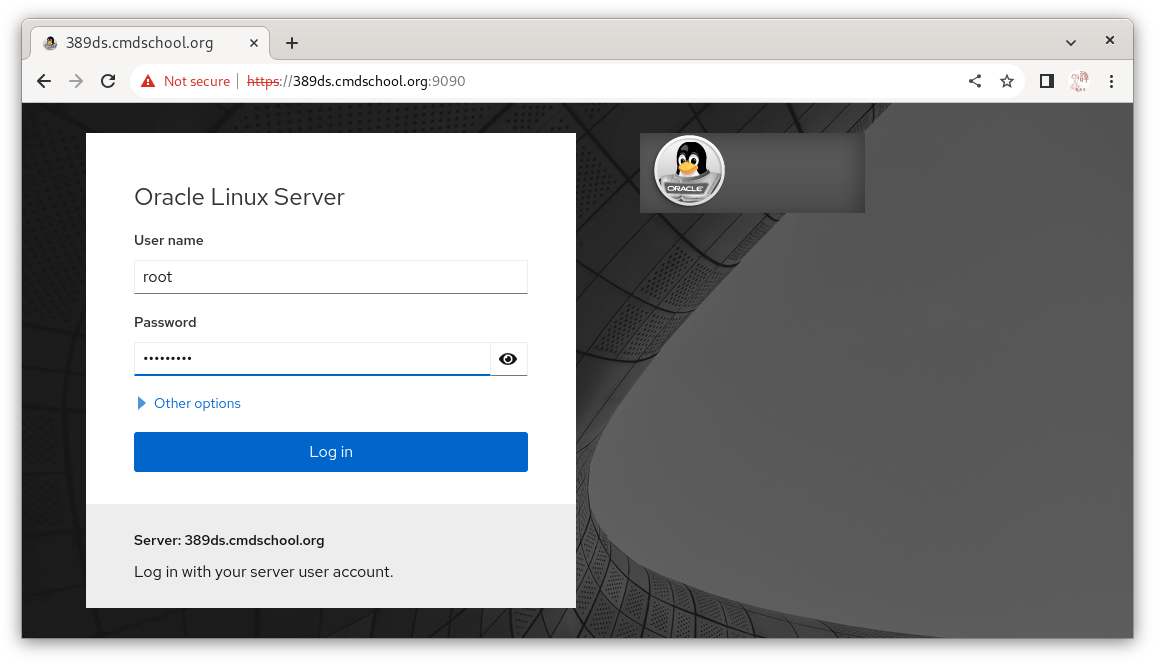
如上图所示,
键入“用户名”和“密码”
单击【Login】
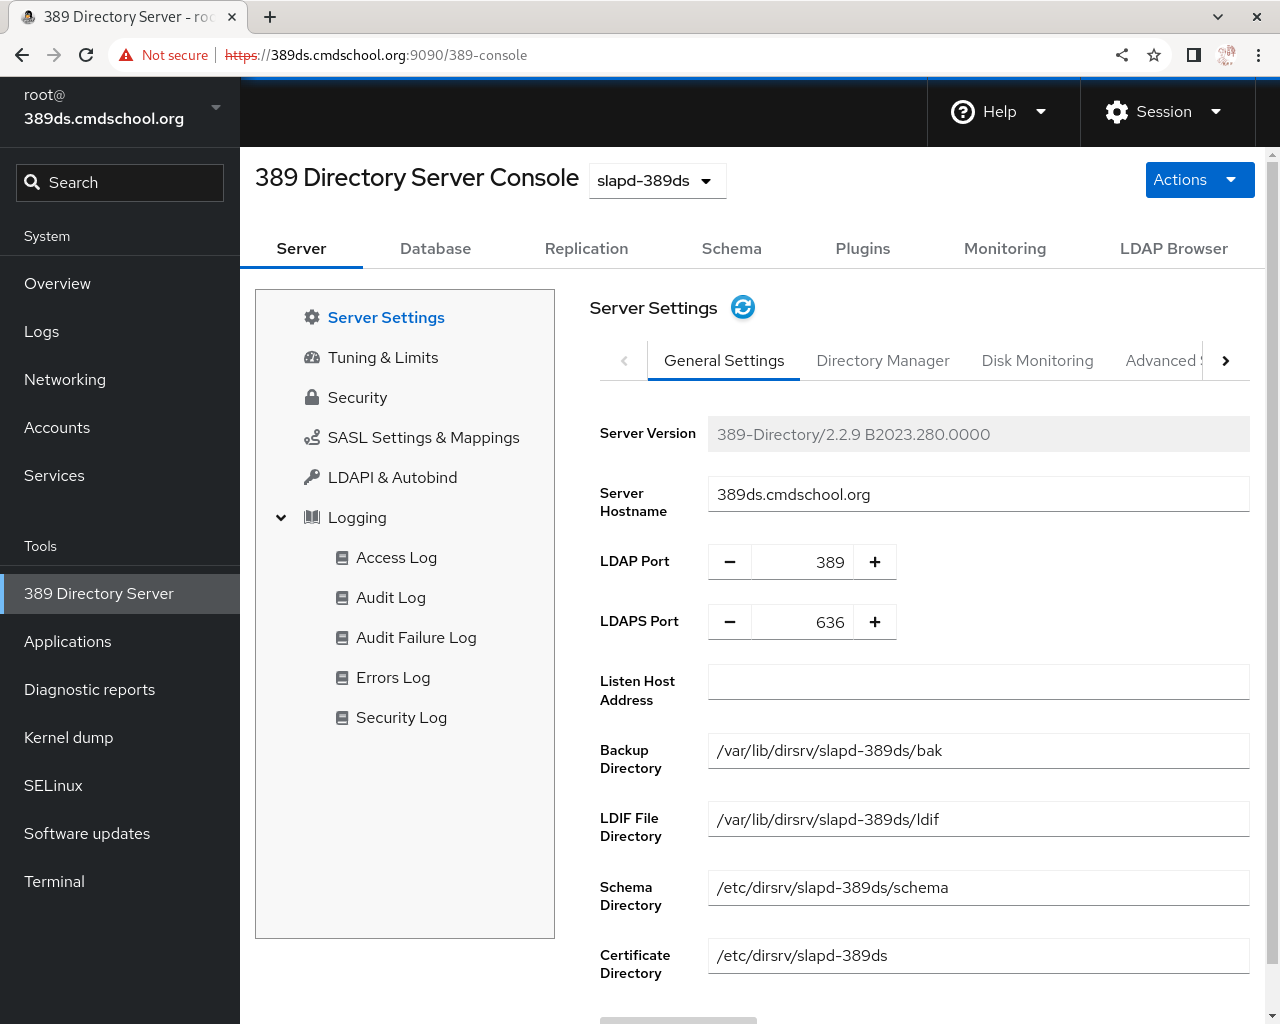
窗口显示如下,
参阅文档
====================================
389服务的安装方法
————–
https://www.port389.org/docs/389ds/download.html#centos-stream-89-el8el9-ds-2x
389安装源
—————
https://copr.fedorainfracloud.org/coprs/g/389ds/389-directory-server/
389服务配置向导
——————-
https://www.port389.org/docs/389ds/howto/howto-install-389.html
没有评论