1. 部署基础环境
学习本章,请先按照如下教程部署Docker环境,
https://www.cmdschool.org/archives/2183
2 使用Docker
In docker-m
2.1 创建Docker程序目录
mkdir -p /data/docker
chown docker:docker /data/docker/
su - docker
mkdir -p /data/docker/app-python
2.2 定义容器一个容器
su - docker
vim /data/docker/app-python/Dockerfile
加入如下内容:
# Use an official Python runtime as a parent image
FROM python:2.7-slim

# Set the working directory to /app
WORKDIR /app

# Copy the current directory contents into the container at /app
ADD . /app

# Install any needed packages specified in requirements.txt
RUN pip install --trusted-host pypi.python.org -r requirements.txt

# Make port 80 available to the world outside this container
EXPOSE 80

# Define environment variable
ENV NAME World

# Run app.py when the container launches
CMD ["python", "app.py"]
2.3 创建应用程序
2.3.1 创建requirements.txt
sudo vim /data/docker/app-python/requirements.txt
加入如下内容:
Flask
Redis
2.3.2 创建app.py
sudo vim /data/docker/app-python/app.py
加入如下内容:
from flask import Flask
from redis import Redis, RedisError
import os
import socket

# Connect to Redis
redis = Redis(host="redis", db=0, socket_connect_timeout=2, socket_timeout=2)

app = Flask(__name__)

@app.route("/")
def hello():
try:
visits = redis.incr("counter")
except RedisError:
visits = "<i>cannot connect to Redis, counter disabled</i>"

html = "<h3>Hello {name}!</h3>" \
"<b>Hostname:</b> {hostname}<br/>" \
"<b>Visits:</b> {visits}"
return html.format(name=os.getenv("NAME", "world"), hostname=socket.gethostname(), visits=visits)

if __name__ == "__main__":
app.run(host='0.0.0.0', port=80)
2.4 构建应用程序
2.4.1 进入应用程序目录
cd /data/docker/app-python/
ls -l
显示如下:
app.py Dockerfile requirements.txt
2.4.2 运行build创建Docker镜像
docker build -t friendlyhello .
注:参数t指定该程序的库名称
2.4.3 浏览构建的镜像
docker image ls
信息显示如下:
REPOSITORY          TAG                 IMAGE ID            CREATED             SIZE
friendlyhello       latest              826c3b33ef7b        3 minutes ago       151MB
python              2.7-slim            46ba956c5967        3 weeks ago         140MB
hello-world         latest              e38bc07ac18e        6 weeks ago         1.85kB
2.4.4 运行应用程序
docker run -p 4000:80 friendlyhello
注:以上使用docker的proxy将4000端口映射到程序的80端口
2.4.5 测试应用程序
curl http://127.0.0.1:4000
信息显示如下:
<h3>Hello World!</h3><b>Hostname:</b> d9fd94aecd2e<br/><b>Visits:</b> <i>cannot connect to Redis, counter disabled</i>
注:由于容器中没有安装Redis服务,所以有错误提示,属于正常现象。
2.5 常见故障解决
In docker-m
2.5.1 配置代理环境
如果是代理环境,请在容器声明文件中使用如下定义,
sudo vim /data/docker/app-python/Dockerfile
加入如下定义,
# Set proxy server, replace host:port with values for your servers
ENV http_proxy host:port
ENV https_proxy host:port
2.5.2 自定义Docker的DNS
sudo vim /etc/docker/daemon.json
定义如下信息:
{
  "dns": ["your_dns_address", "8.8.8.8"]
}
注:参数一填写本地DNS地址,参数二使用谷歌DNS地址
重启Docker服务使配置生效:
sudo service docker restart
2.6 其他常用命令
docker build -t friendlyhello .  # Create image using this directory's Dockerfile
docker run -p 4000:80 friendlyhello  # Run "friendlyname" mapping port 4000 to 80
docker run -d -p 4000:80 friendlyhello         # Same thing, but in detached mode
docker container ls                                # List all running containers
docker container ls -a             # List all containers, even those not running
docker container stop            # Gracefully stop the specified container
docker container kill          # Force shutdown of the specified container
docker container rm         # Remove specified container from this machine
docker container rm $(docker container ls -a -q)         # Remove all containers
docker image ls -a                             # List all images on this machine
docker image rm             # Remove specified image from this machine
docker image rm $(docker image ls -a -q)   # Remove all images from this machine
docker login             # Log in this CLI session using your Docker credentials
docker tag  username/repository:tag  # Tag  for upload to registry
docker push username/repository:tag            # Upload tagged image to registry
docker run username/repository:tag                   # Run image from a registry
2.7 分享Docker
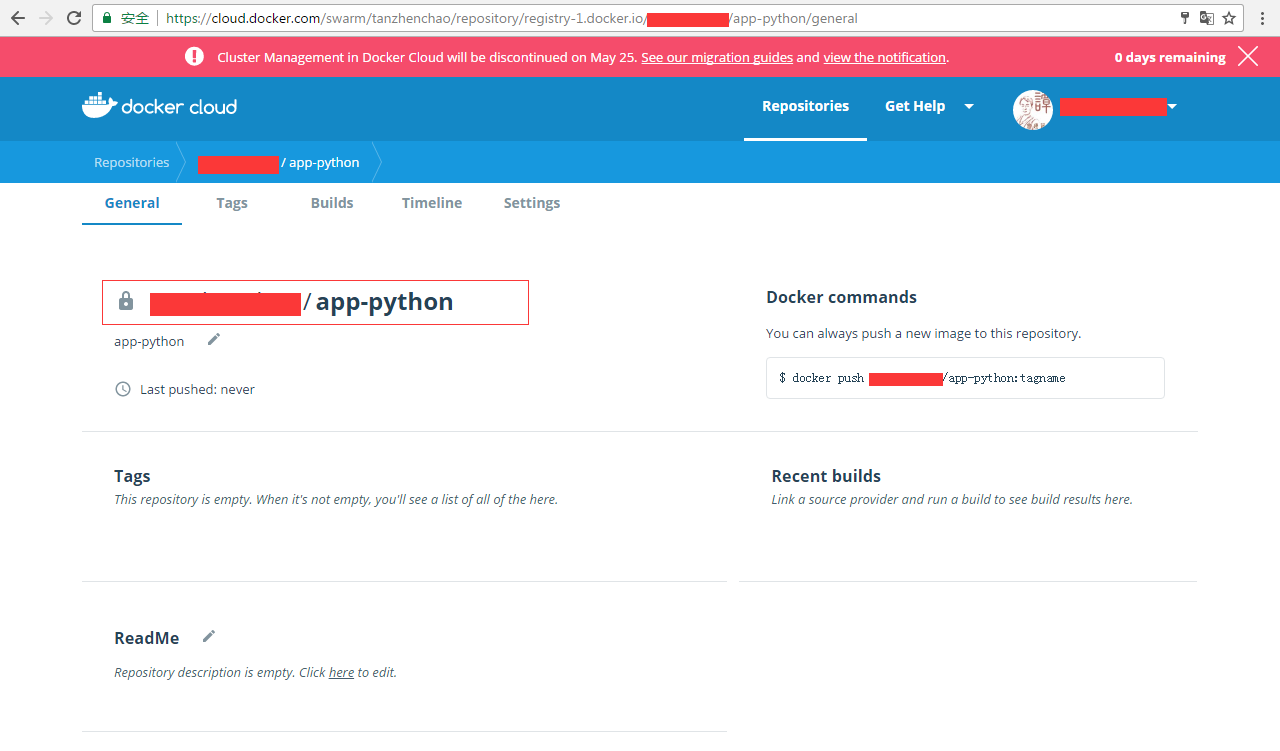
2.7.1 注册Docker
http://cloud.docker.com
注:请在以上链接注册一个docker账号

以上范例,
创建账号“userxxx”
创建代码仓库“app-python”
2.7.2 登录Docker
In docker-m
su - docker
docker login
向导如下:
Login with your Docker ID to push and pull images from Docker Hub. If you don't have a Docker ID, head over to https://hub.docker.com to create one.
Username: userxxx
Password:
Login Succeeded
2.7.3 标记镜像
In docker-m
使用格式如下:
docker tag image username/repository:tag
根据之前的镜像,我们应该这样操作,
su - docker
docker tag friendlyhello userxxx/app-python:part1
查看新的标记,
docker image ls
信息显示如下:
REPOSITORY               TAG                 IMAGE ID            CREATED             SIZE
friendlyhello            latest              826c3b33ef7b        3 hours ago         151MB
userxxx/app-python   part1               826c3b33ef7b        3 hours ago         151MB
python                   2.7-slim            46ba956c5967        3 weeks ago         140MB
hello-world              latest              e38bc07ac18e        6 weeks ago         1.85kB
2.7.4 发布镜像
In docker-m
su - docker
docker push userxxx/app-python:part1
参阅文档:
=============================
基本概念:
—————————–
https://docs.docker.com/get-started/#test-docker-version
安装Docker:
—————————–
https://docs.docker.com/install/
官方源地址:
—————————–
https://download.docker.com/linux/centos/7/x86_64/stable/Packages/
官方Hub地址:
—————————–
https://hub.docker.com
如何分享你的镜像:
—————————–
https://docs.docker.com/get-started/part2/#share-your-image

没有评论